During the early 1980's some video distribution companies in the UK used a cardboard sleeve case sometimes called a 'slip case'. Essentially a cardboard box for the VHS tape, with an open top to remove it.
One such company was Intervision, who released a number of horror films such as Zombies Dawn of the Dead, The Brood and Rabid. In fact the first time I watched this film on television in the 1980's was from a Betamax rental tape which had an almost idential cardboard sleeve.
It wasn't long before the hard plastic case prevailed and became the standard for storing a VHS cassette tape by video rental shops and the retail market. The cardboard sleeve was discontinued, except for a side opening cardboard version which continued to be used for retail blank tapes.
Over 10 years ago I had an almost intact carton of Zombies Dawn of the Dead in very good condition, which I later sold. Curiously it came with a large protective hard plastic case like the old style music cassette tapes. Perhaps the type of protective case which a libarary may have used for it's loan tapes. That was one of the best examples Ive seen and part of me regrets selling it, even though I was no longer collecting them.
Fast forward to today and with my renewed interest, I acquired another version with a complete cardboard sleeve. However, as with many others it was later cut so it could be inserted into a standard plastic case. This was usually done by the Video rental store. This is why there are very few cardboard sleeves still intact. I would describe the overall condition of this one as average and I paid £60 which was more than I should have. You can expect to pay double that for one in excellent original condition, of which I’ve rarely seen. After my 'restoration' I would say the amount I paid is a more accurate value. As with any collectable, the serious collector wants the 'mint' example and will be prepared to pay a premium of it. In 2025 I would estimate a mint example to be worth about £120.
However, at the time I was more interested in digitalising the film which I never managed to do previously. So I wasn't looking for one in collectable condition. I also took a huge risk in buying it sold as seen and untested - again, something I wouldn't normally do. Fortunately the tape play was complete and in quite good contition with just some colour loss for about 10 seconds during the opening titles.
Some of these cardboard cartons were later 'reconstructed'. That is, they were removed from the plastic case and sellotaped back together to appear as they were when first issued. Some of these 'reconstructions' have been done in more recent years in an attempt to increase their value. As mentioned earlier, the 'holy grail' for a collector is a complete intact carton. These rarely come on the market because these will most likely already be in the hands of collectors who will keep them long term.
My newly aquired Intervison Zombies Dawn of the Dead VHS is one of those which has been 'reconstructed' using sellotape. I could simply leave it as it is. However, the closed end was taped to the top instead of the bottom for some reason. It's difficult to find online photographs which show all sides of the carton, but my previous version had the top end open. Also, the back spine with text was the wrong way round. These things niggled at me so I started to consider taking the carton apart once more, essentially, deconstructing it.
 |
| My VHS copy of Zombies Dawn of the Dead Intervision pre cert with sellotape |
I'll start by saying that I believe in preservation and sometimes things are best left as they are. However, there are times when a sensitive/sympathetic restoration is possible, albeit at considerable risk of making something worse. This is one of those. My VHS was in average condition at best so I felt it was worth the risk. This was a popular rental film so it's no surprise that the condition of it's carton is looking worn. This example was probably from one of the busier video rental shops of the time.
I was fortunate that my box had all original five sides, which is quite rare. It's common to find the blank spine missing as this was discarded when the cut pieces were put into a standard plastic case. The bottom closure lid is also usually missing.
Another good reason to do this is because over time the glue from the sellotape will penetrate into the cardboard leaving a permanent dark stain. The more glue that transfers into the cardboard the darker the staining. Eventually all the glue will absorb into the cardboard leaving just the plastic backing which will seperate from the cardboard.
As already mentioned, the playback on the tape is actually quite good. There's about 10 seconds at the beginning where the colour fades but otherwise it plays quite well considering how old it is. I made a digital copy as part of my preservation process.
Stage 1 - Preparation
Warning - don't attempt this unless you're prepared and confident!
I'll start by saying don't attempt this unless you're very patient and have the correct basic 'tools' to hand. Rushing this will almost certainly result in further damage.
I used:
- Haidryer
- Craft knife
- Tweezers
- Isopropyl (alchohol)
- PVA white glue
- Fine art brush for applying glue
I started by researching methods for removing sellotape from paper products. It quickly becomes apparent that sellotape is rather stubborn and once attached it won't come off easily, especially if it's been there a long time. Any rash or clumsy removal of sellotape will almost certainly result in permanent damage. A hairdryer was recommended to heat the sellotape before attempting removal.
I found that Isopropyl alcohol was often recommended for removing sticky residue so I bought a bottle from the pharmacy just in case.
My plan was to insert the seperated sleeve artwork into a spare hard plastic case for preservation. I certainly didn't like the idea of leaving any of the sellotape on the cardboard and risk further damage from the adhesive glue.
The damage at the top right corner of the carton was caused by removal of a circular adhesive sticker. This was probably the post-rental sale price, or perhaps the catagory e.g. Horror. It was probably sold for a few pounds post-rental. It's a shame as the damage may have been avoided simply by using a hair dryer to heat it before carefully pealing off. Having said that, some adhesives might not even respond well to heating.
Most of the photographs I've used were taken in the evening with artificial light so the cardboard box appears darker than it is. I'll take more photographs of the restored carton in daylight when the project has been completed.
Stage 2 - Removal of sellotape
With everything I would need to hand, I started by using the hairdryer on it's hottest setting and using it on the sellotape.
I used a craft knife with a square blade to prise the edge up. This worked well and I could even lift it with fingers and carefully remove a short piece. The tape was still sticky which means it hand't yet all penetrated into the cardboard - a good sign.
The key was to be patient and not get to 'greedy'. By that I mean work on short sections at a time, then pause and reheat before proceeding further. You can see from the photo below I did take off some traces of the cardboard surface with this early attempt so I needed to proceed very slowly.
There was sellotape on all sides both inside and outside of the box. This took a while to remove but all of it came off without too much trouble.
 |
| Here you can see the permanent staining left by the sellotape |
 |
| The sleeve after removing sellotape from one long edge and the top end |
 |
| Damage seen here is from a circular sticker which was hastily removed |
Stickers were often used on rental tapes. This could be to indicate the catagory of film such as 'Horror'. It could also be the cost of renting or the price when it was sold post-rental. Alternatively, the age rating when that was later introduced and had to be added to tapes retrospectively to make them legal. Yet another possibility is that it's simply the video rental store libary number. I can understand why people would try and remove these, but as you can see here, sometimes it's best to leave them alone. It also reflects the history of the tape. It's quite rare to find a tape with these orginal stickers as so many were removed in the belief it spoiled the appearence. As a rule, never try and remove stickers from a vintage tape.
 |
| Examples of stickers used on rental tapes during the 1980's |


 |
| This tape has certainly seen lots of use during it's rental life |


 |
| All the sellotape removed |


 |
| Remounted into an old VHS case |


 |
| Pieces carefully stored |
Stage 3 - Removal of 'Please rewind' sticker
It bothered me that the 'Please rewind' sticker was placed over the Dawn of the Dead yellow label on the spine of the video cassette. This was an unusual place to put it as they were usually found on the front side of the cassette.
I decided to remove it and reposition it to where it would normally be found.
I thought this was probably going to be harder than the sellotape removal because the yellow spine was paper and had no 'glossy' finish. This was indeed very delicate work which was mostly successful.
I used the same technique as before with the hairdryer. This worked well with only one very small area of the yellow label which stuck to the back of the sticky label.
On removal of the 'please rewind' sticker it became aparent why it was there. Someone had placed it there to cover up damage on the yellow spine label. The damage was already there prior to my attempts to remove it. In fact, the yellow spine label was being held in place by the other sticker on top. It was so loose afterwards that it came off completely - in two pieces.
Here's how it looked before I started.

 |
| Unfortunate positioning of the 'Important please rewind' sticker |
 |
| Strategically placed sticker to hide damage and hold the yellow label in place |

The yellow label came off by itself once the red sticker was removed.
Notice the texture on this video cassette. This is typical on the first release tapes and later versions had a square pattern.
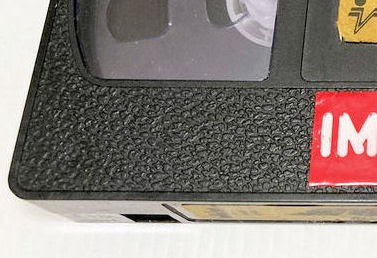 |
| The first edition VHS tapes had this texture |
 |
| I removed this glue residue from the cassette spine using Isopropyl |
 |
| The 'Important please rewind' sticker repositioned to the correct place |

 |
| Damage to the yellow spine sticker was already there |

The damaged yellow spine label was so fragile in the middle it seperated into two pieces. I used a fine brush to carefully apply white PVA glue to the back of both pieces and reposition them together directly onto the spine of the video cassette. I also used a little of the same glue to secure the 'Important please rewind sticker' to it's new position and also slightly under the edges of the other yellow cassette label.

Not surprisingly, the yellow paper labels are fragile after many video rentals over many years. This is an area where people tend to touch as they push the cassette into the VCR.
Despite the damage to the yellow spine sticker, I still prefer it like this. The damage is part of it's history. It's clearly a tape which was rented out many times!
Stage 4 - Reconstruction of the cardboard sleeve
Whilst preservation was my main goal, I could't help thinking how nice it would be to reconstruct the carton in a sensitive way. Fortunately, my box had all 5 sides. It's common to find one side missing or the top/bottom missing.
Update 1
Eventually I found some good photos online of a complete Intervision cardboard sleeve. I'll use those as my reference photos when I put it back together. It seems the opening is on the top as I thought. I believe some cardboard cases had the opening on the bottom for some reason.
Some more online research gave me some good information about conservation tape. It seems if I was going to do the best repair possible, I should use Japenese Acid free paper tape. However, this isn't easy for me to get and is quite expensive. There are different types but the cheapest is about £10 plus £20 for the fixing glue. I've ruled out that option.
I'm still considering using PVA glue to overlay some paper cardboard along the cut edges. This would be a permanent repair so it needs to be done well the first time. I would also have to be sure the new card wasn't too thick to obstruct the cassette in the box.
I found some strong brown wrapping paper which has potential. It's very strong and in unfinished brown. Not quite as good colour match as I would have wanted but it has the potential to produce a nice smooth tight fit and still be strong enough. Obviously some integrity is lost by not having additional tape over the joins on the outside, making it less durable but something I could live with.
At one point I was thinking baking paper could be a good option. It's strong and a good colour match. Until I realised it's not acid free.
Update 2
I found myself procrastinating too much so I decided to go ahead with the strong brown wrapping paper. I call it wrapping paper but it’s thicker than most and ‘unfinished’ like a toilet roll.
Despite it not having the ideal colour match I it was a good weight and texture, plus it was inside so not visible. This came in a roll and the curve did not bode well for gluing. From past experience, placing it under heavy items to go flat doesn't work. I decided to use a hot iron which actually worked well. So I now had a piece of flat paper which wouldn't try and curl up as I tried to glue it down.
It didn't all go to plan. I did make a few mistakes along the way, despite being cautious. I think this might be because I didn't follow my own personal rules - I started it in the evening when I didn't really have enough time!
Just when I thought things were going well I realised I somehow glued two non-matching pieces together. I still don't understand how I did it. This was a near disaster as I had to quickly unpeel the glued sections which were already started to stick. I just about managed to do this without damage. That's another reason to use PVA glue - it's still possible to remove and reposition if you do it quickly. If I'd used any form of impact adhesive then it would have been almost impossible to remove again. The spine with text should have been glued to the centre, not side as seen below.
 |
| Spot the obvious mistake - the centre spine is missing!!! 😫 |
Second attempt at glueing the pieces together. I was lucky that there was only minimal surface damage following my mistake.
 |
| My centre repair strip was slightly off-centre but not enough to cause a problem |
 |
| The bottom closesure flap is very worn but looks fine in place |
After adding the second spine repair strip

 |
| All four sides and bottom attached |
I also had to make one extra cardboad tab for the bottom. I was able to use the intact one as a template. This was a bit fiddly and didn't look the best but it was going to be on the inside.
 |
| I made an additional tab from similar weight cardboard |
 |
| Both tabs attached - not pretty but functional |
 |
| All pieces attached ready for the final stage - glue the two open long edges |
I ran out of time to complete the carton by joining the last two long edges to form the box. This was going to be the hardest since it would be closed, making it harder to ensure the edges were in good contact. Probably good to let the glue bond before proceeding anyway.
Update 3
The next day I glued on the final long edge. This was going to be the most difficult edge to glue because of limited access to the inside without any side opening.
I'd cut out a small section at the bottom of the final piece so it wouldn't overlap on the exiting repair, making it too thick. The downside of that was that it didn't fully join at the very bottom edge. I think I realised that but thought it wouldn't matter so much on such a small section at the bottom. Not the end of the world as I might still see if there's something more I can do to make it stronger. What I didn't want to do was add additional 'patch' repairs everywhere.

I was contemplating running a bead of PVA glue along each of the newly joined long edges. The glue dries clear so wouldn't be noticable. Although this could make it too brittle and simply break when the cardboard flexes. I concluded this was not a good idea.
I used a spare old VHS tape to put inside the carton to help apply pressure to the edge and maintain the shape. I then gave plenty of time to let the glue bond before assessing how successful it was.
The completed box

 |
| The creasing and staining was caused by the sellotape |


 |
| Not the best condition, but complete |


 |
| Restoration of the bottom lid closure came out well |
 |
| I've stored the completed carton inside a larger VHS plastic case |
At some point I'll probably look for a transparent plastic case.
Conclusion
For me, this has been a worthwhile project. It has proved more difficult than I anticipated so don't attempt this lightly. It may not look that different from before, but it's returned to it's original form in a better state of preservation. Admittedly, the carton suffered from some trauma during this process with the text spine a little worse for wear. I think this is mostly because the sellotape did a good job of hiding some of the imperfections which were already there. You could say sellotape 'hides a multiple of sins'.
I did this over several days in stages which I think this was a good approach as it gave time for the glue to bond before proceeding.
As mentioned, someone who has bookbinding skills would be the ideal person to undertake a more proffessional durable repair. They would have access to good quality repair paper/cardboard plus glues and tools.
I also like the idea of making a reproduction cardboard case using a laser printer. With a good high resolution image, printer and correct weight card. However, I don't own a laser printer so not something I can attempt for the time being.
What I'd do differently
Take the first steps of removing sellotape even slower.
I should have used the Isopropyl more sparingly and gently than I did because this can remove colour.
I've produced a Youtube slideshow video here:
Update 4
Having achieved my aim with this project, I started to contemplate whether it's possible to take this a stage further. What it some of the artwork damage could be 'touched up'. This is moves into another level similar to that of film poster restoration. Again, something you would leave to professionals for any high value artwork.
However, I found a set of Derwent ink pencils. It did occur to me these would be quite well suited for touching up small scratches. I'm very tempted to try a test and apply a correct colour match to a small area of damage like a small scratch on black. I've noticed there are a few such areas on the box. Again, this is risky territory and application of the wrong colour and wrong type of paint can leave permanent damage.
I proceeded with some colour touching with mixed results. Here's a selection of photographs taken in daylight for colour interpretation. Overall, the printed text spine is the worse for wear, perhaps not surprisingly. As mentioned before, the sellotape was hiding much of the wear and tear. The front artwork is mostly clean with just the damage at the top left from an old adhesive sticker. It feels like I've taken this project as far as I can and now content to leave it as is. I'm happy to have a complete carton and tape, even in this condition.


If you're interested in this film, see my other post ”Zombies in the UK - Zombies Dawn of the Dead (1978)” published October 2022. I've included some information on values based on eBay sales of Dawn of the Dead pre certs.
Here's yet more photos of the carton after restoration. I used my Epson flatbed scanner to get some more high resolution photos. I think the colour likeness is better from my scanner than some of the photos I took before. I even scanned the cassette itself.


 |
| These cassette labels often become damaged following lots of use |


Update 5
The damage to the sticker on the spine played on my mind a little. I started to wonder whether it was possible to undertake a repair. Again, this was not something really necessary but became a small project challenge.
I digitally recreated some spine labels. I did this by using scans and photos of complete labels. I then used Paintshop Pro to recreate a complete spine label to the actual size. I made these in black and white as I intended to print them directly onto yellow paper.
 |
| The spine label I created using Paintshop Pro |
There's a slight curvature in the 'Zombies' lettering but otherwise it's a good replication.

I was able to find some yellow A4 paper which was a good colour match to the original label. I printed these and then carefully cut it to match the existing text. I decided not to replace the whole label and only the missing part. It would have been easier to replace the whole label and harder to tell it had been replaced, but prefered to keep as much of the original label as possible. This made it more of a challenge to match only part of it.
After the aging, I glued it in place with PVA glue.

 |
| I decided to replace only the missing section |


Whilst not perfect, I'm satisfied with the end result. Yes, you can see the paper join and the smaller lettering is slightly 'off' but I can live with that. I was a bit lazy in that I glued the new section on top of the old part, rather than remove all residue from the old section first. That may have made the join less visible. I may also still 'age' the label to match the colour of the old pieces. I was thinking that a charcoal stick might work well for that.
I've still got the option to replace the whole label if I decide to do so in future. For now though, I'm content to leave things as they are - project complete!